Step-by-Step Guide for Creating a Birthday Campaign
Updated Jun 17, 2025·1 min read
birthdaycampaign
- Go to the Loyalty Campaigns Section: Open the "Marketplace" tab and select "Loyalty Program" > "Campaigns".
- Create a New Campaign:
- Click the "Add +" button to start creating a new campaign.
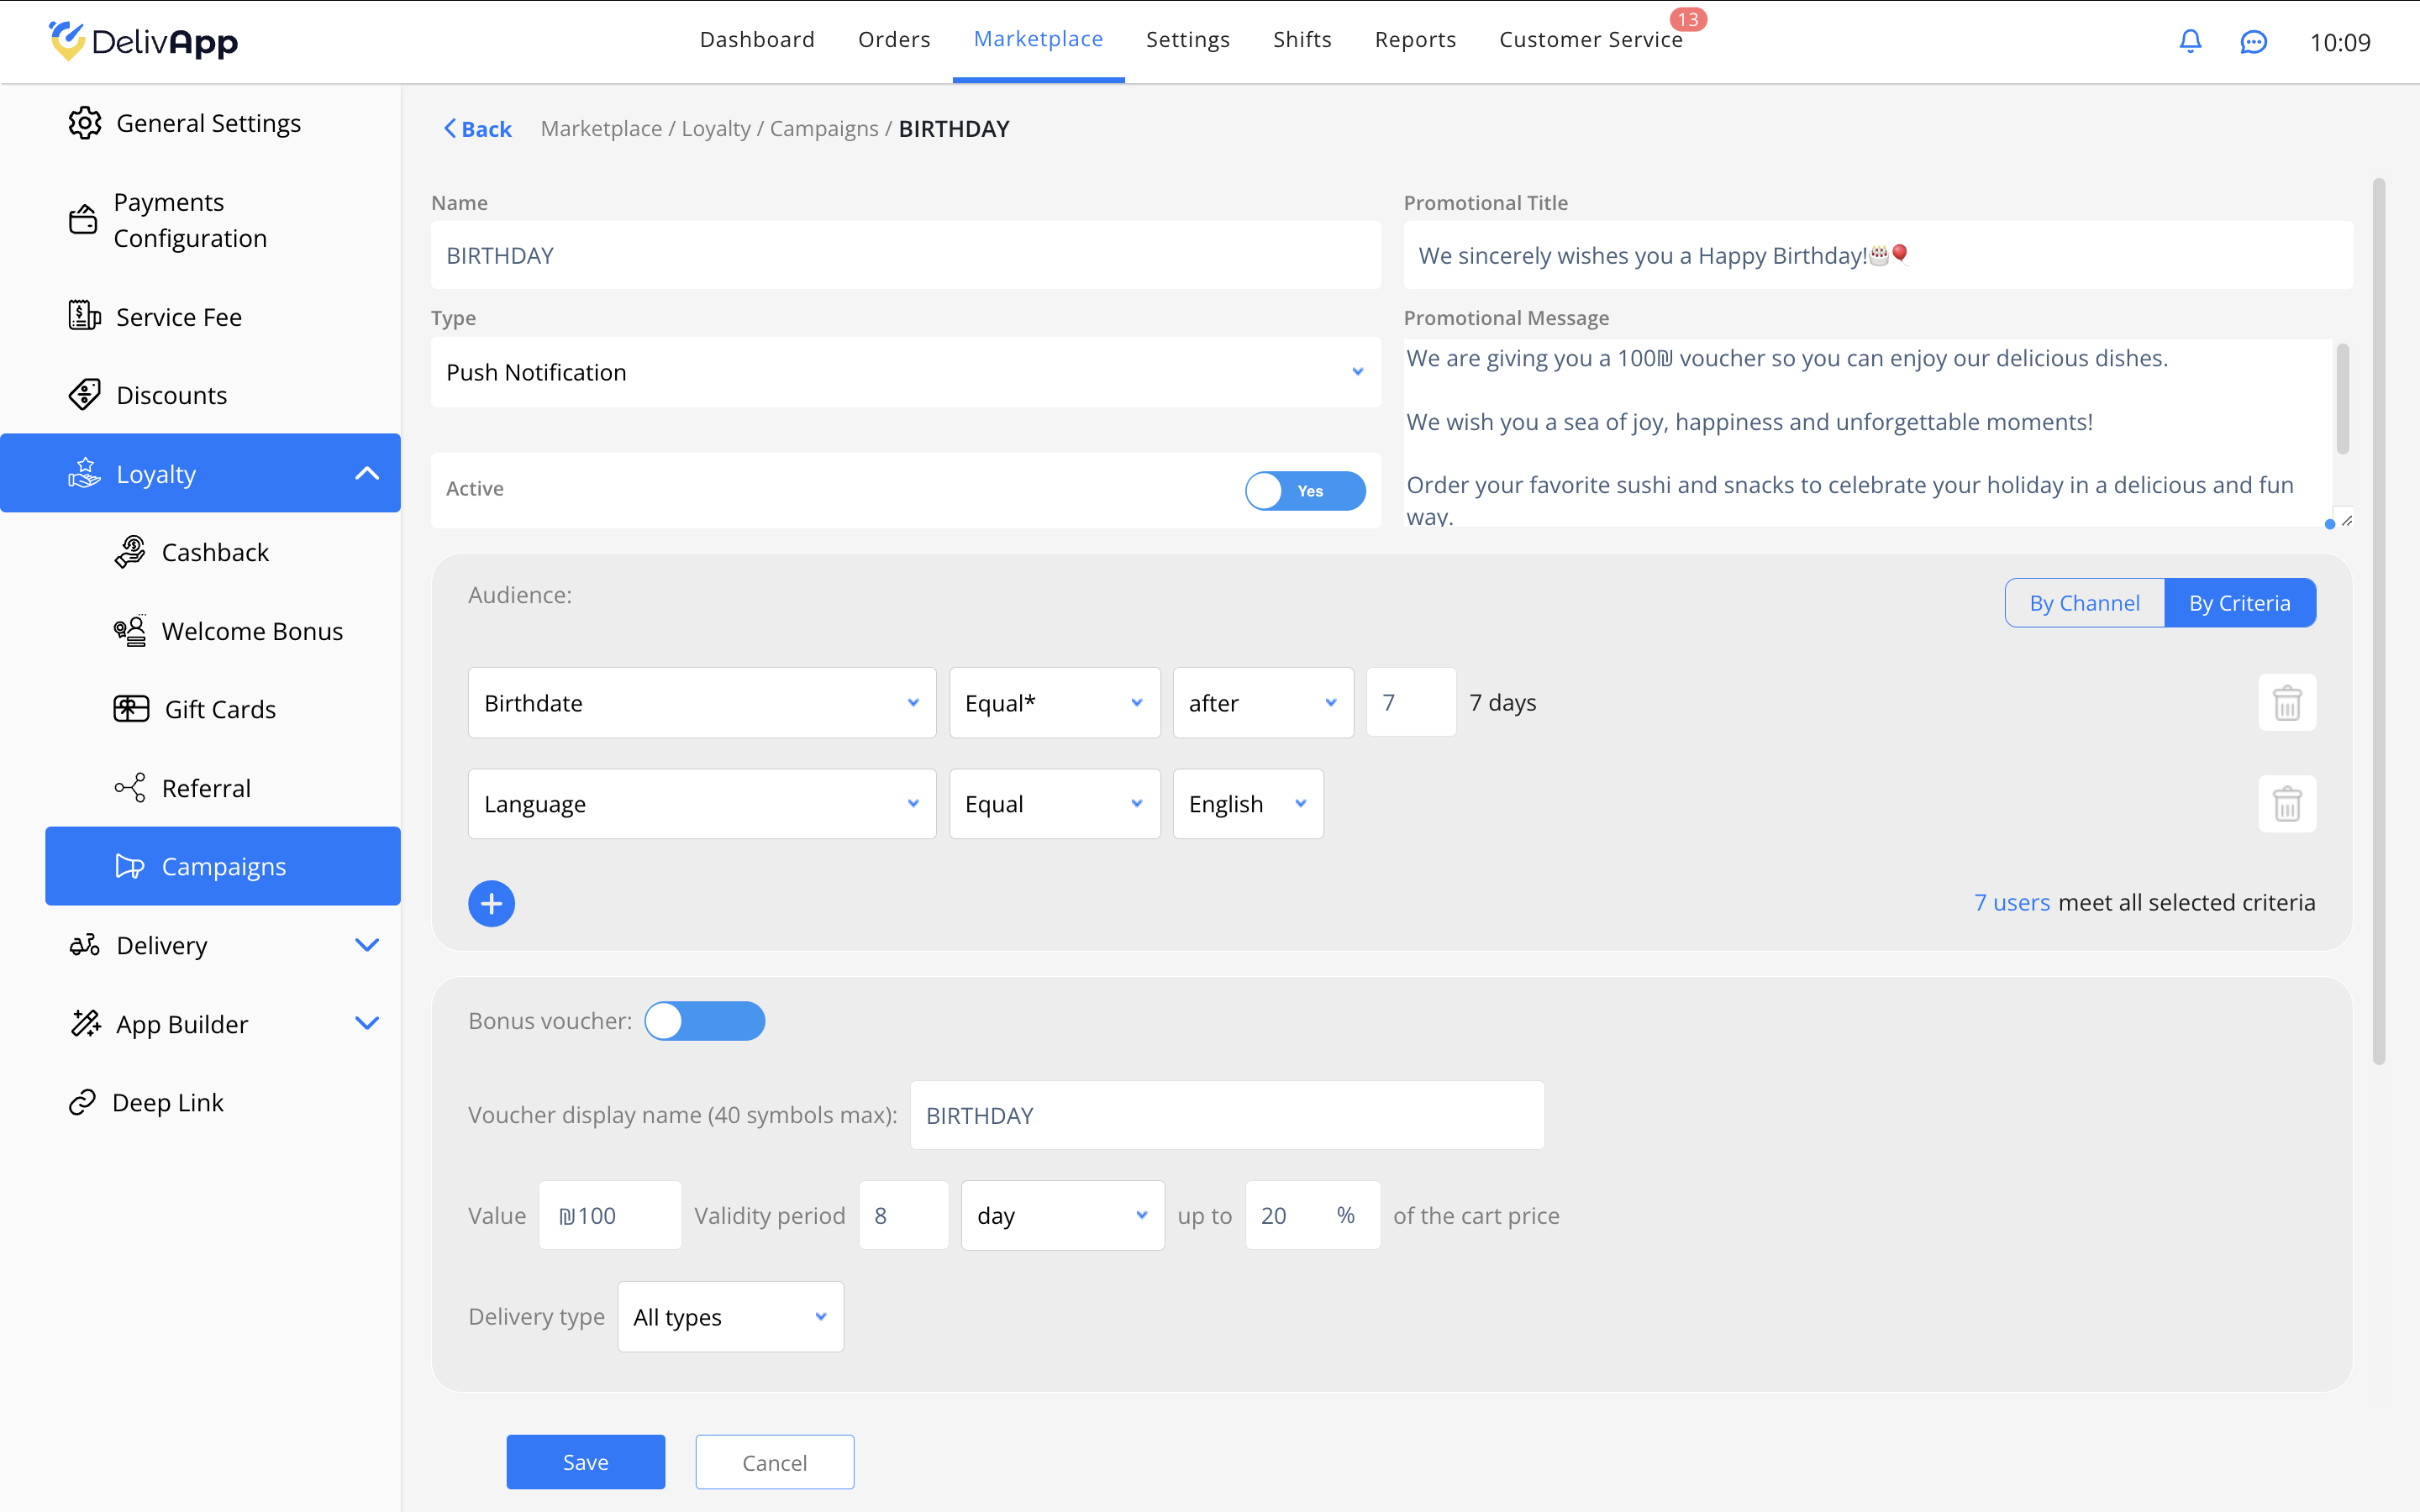
- Set a Campaign Name:
- Enter a campaign name, such as "BIRTHDAY".
- Select Campaign Type:
- Choose "Push Notification" to send notifications to users.
- Define Audience Criteria:
- Select "Date of Birth" and set "after" a certain number of days (e.g., 7 days). This will target users before their birthday.
- Specify additional audience criteria, such as "Language" for localization.
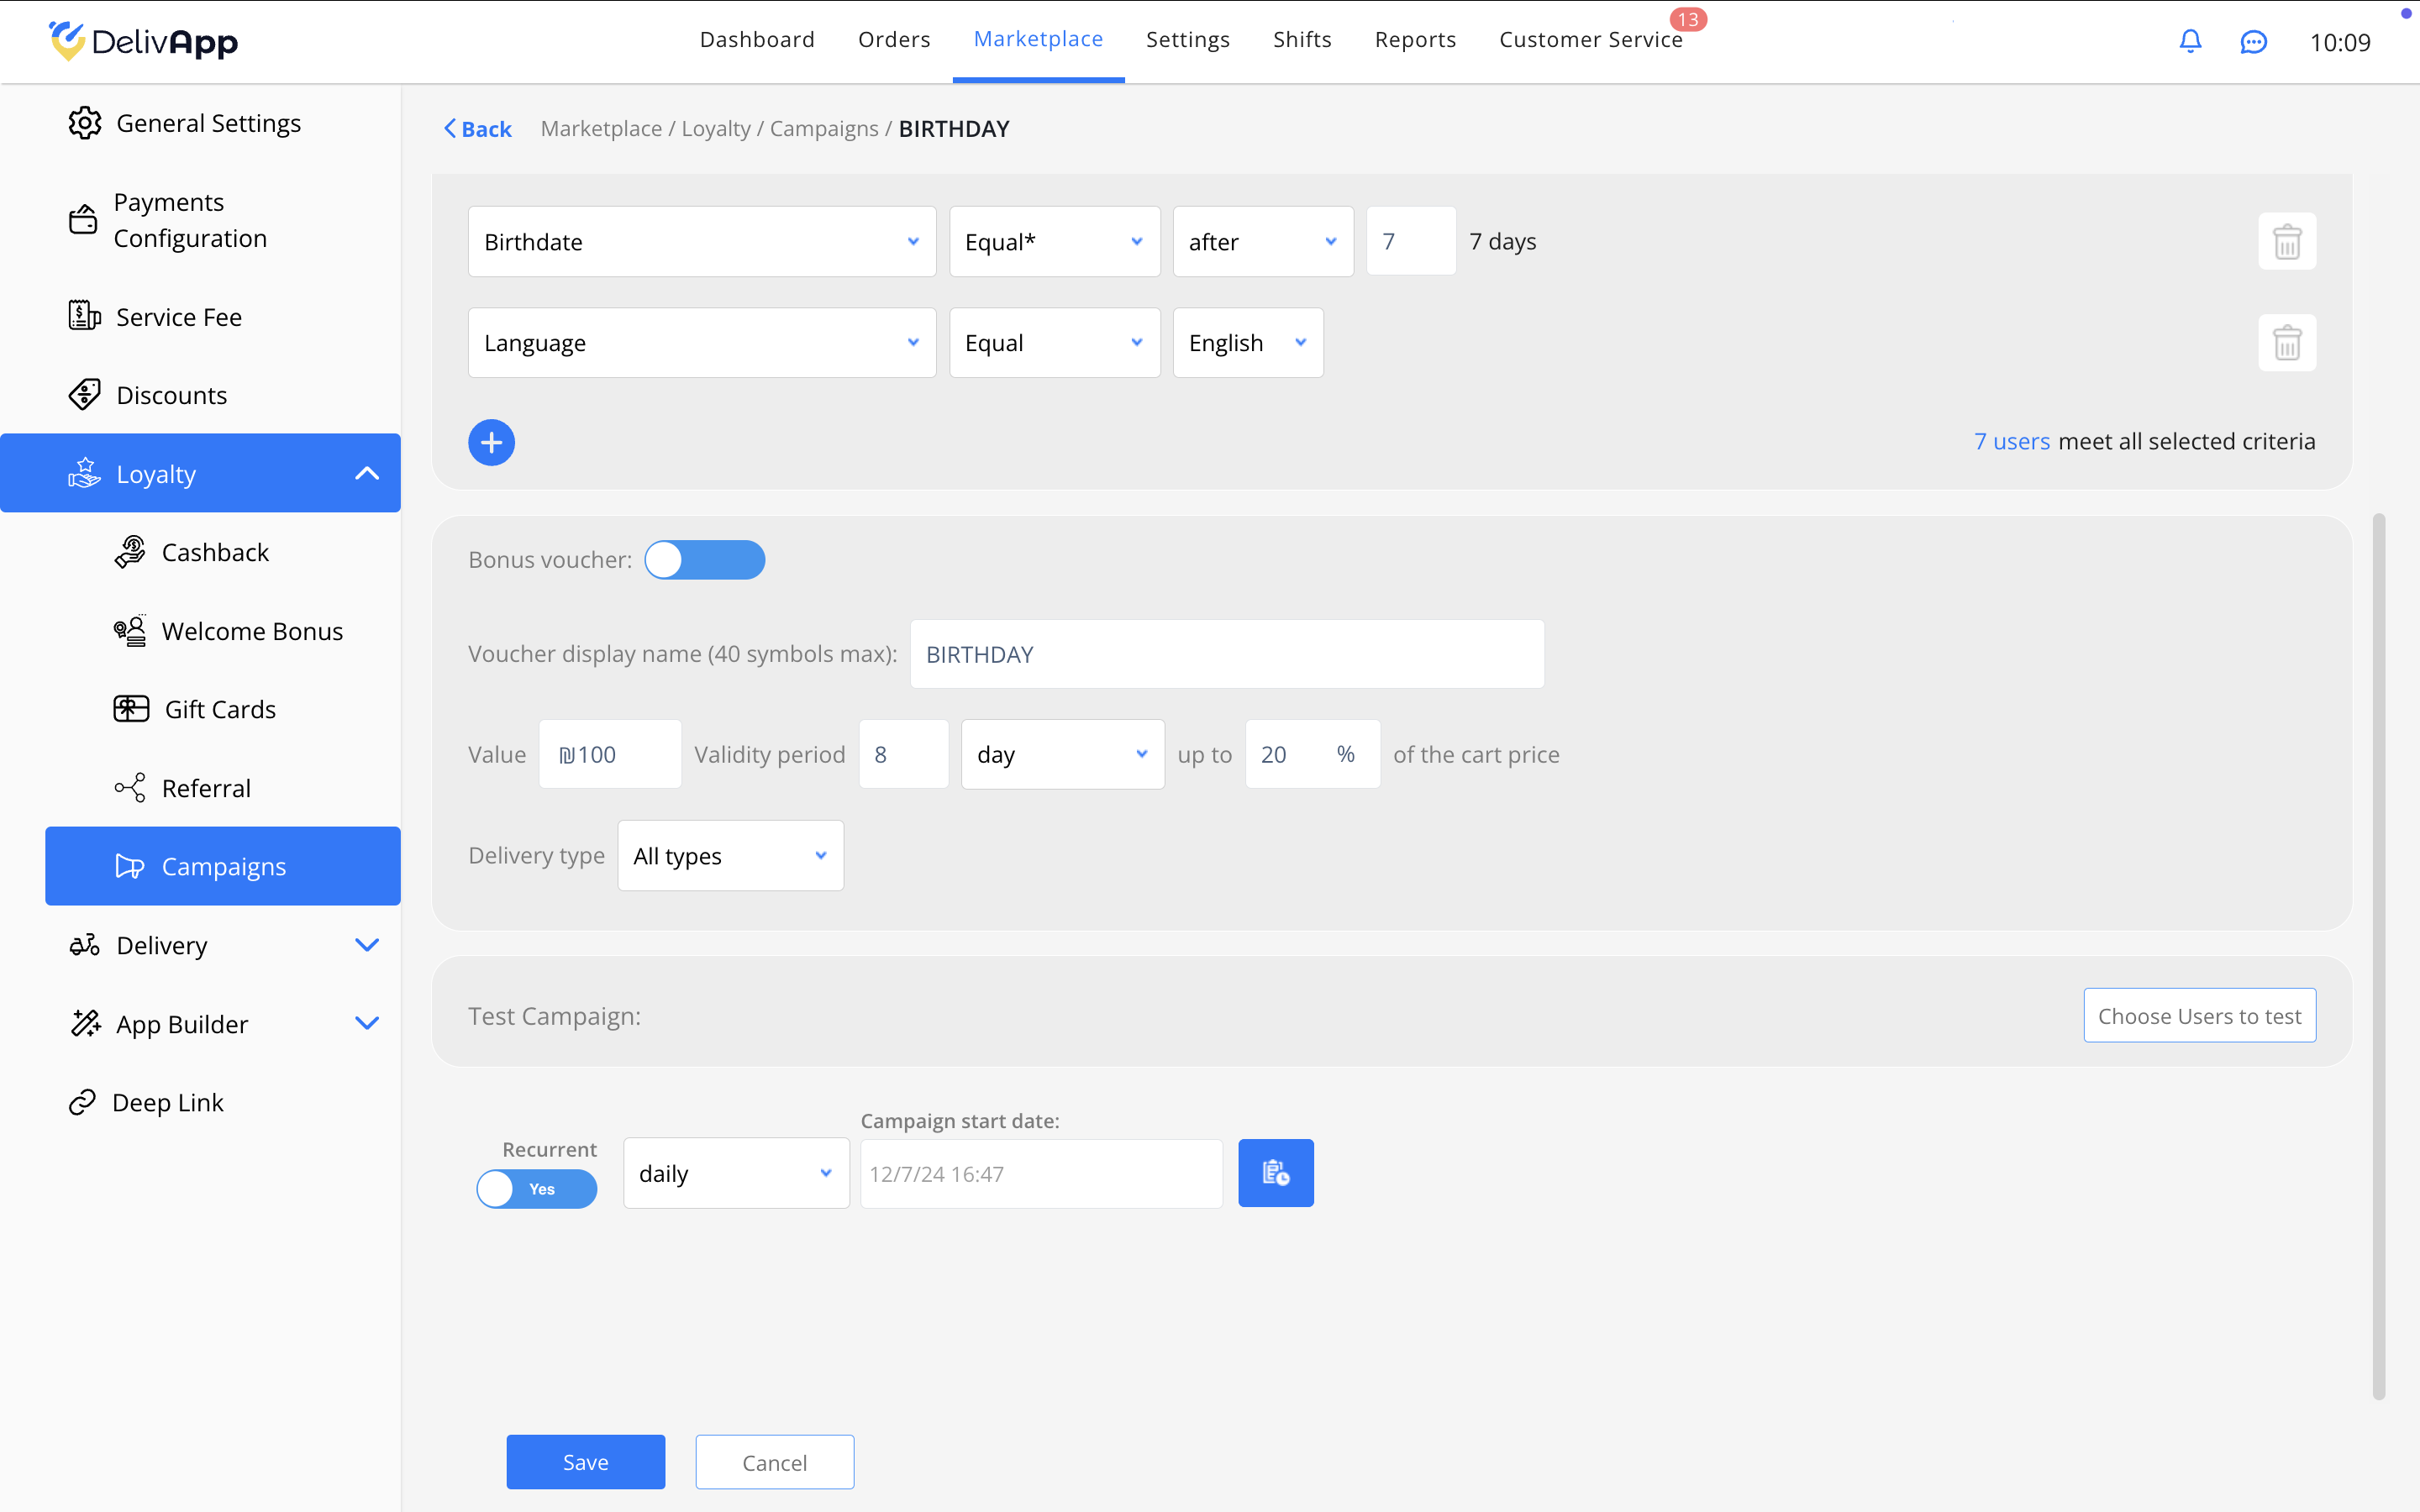
- Add a Bonus Voucher:
- Toggle the "Bonus Voucher" switch to activate it.
- Enter the voucher amount (e.g., 100 ₪) and set an expiration period (e.g., 8 days).
- Specify the maximum discount percentage (e.g., 20% of the basket total).
- Configure Recurrence:
- Set the campaign recurrence to "daily" to ensure it repeats and targets new users.
- Save and Activate:
- Click "Save" to save the settings and activate the campaign.
Was this article helpful?