How to assign an order to a courier
Once an order is received on the DelivApp Admin Portal, the manager has to assign it to the courier.
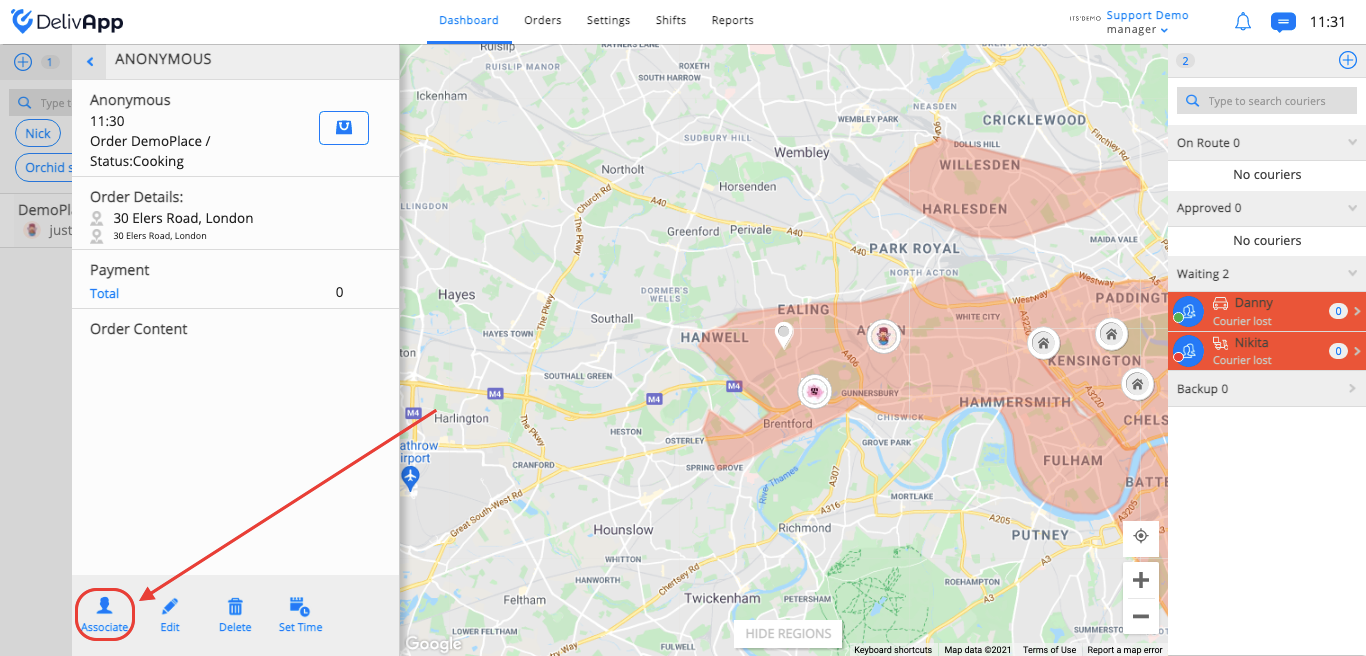
On the dashboard, click on the order and then click on the “Associate” button on the order’s card.
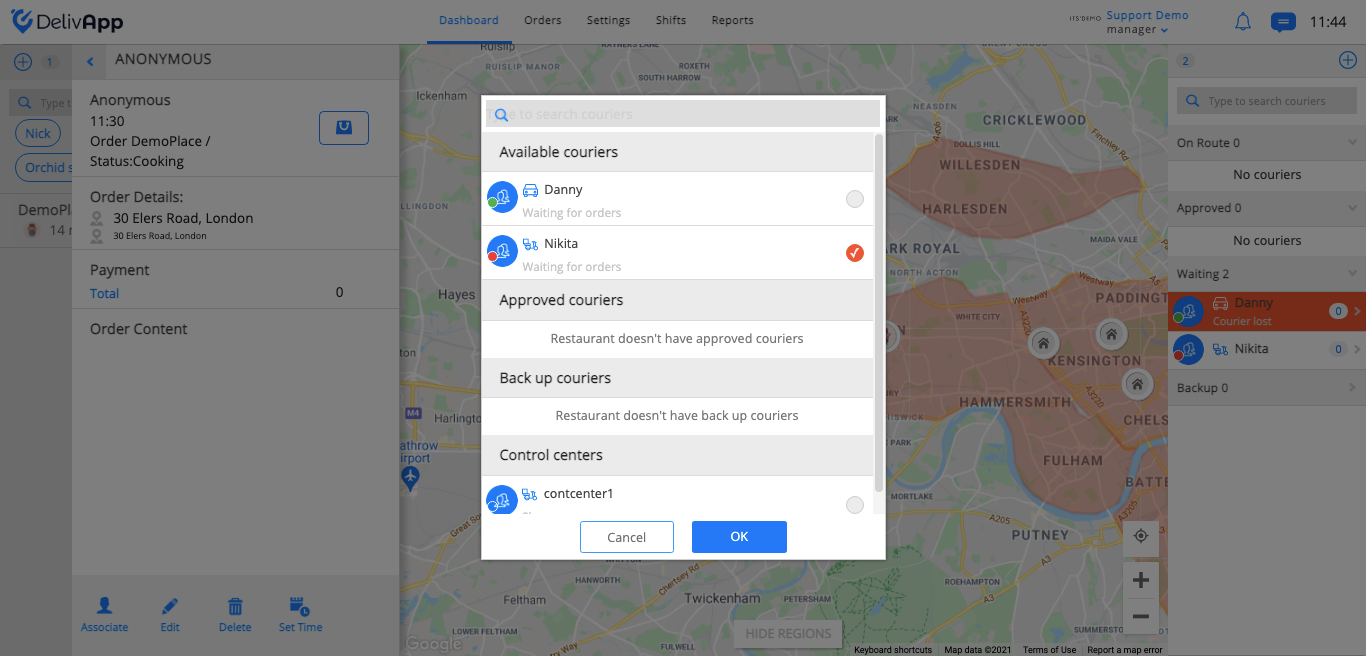
Choose an available courier from the pop-up window and click on the “OK” button.
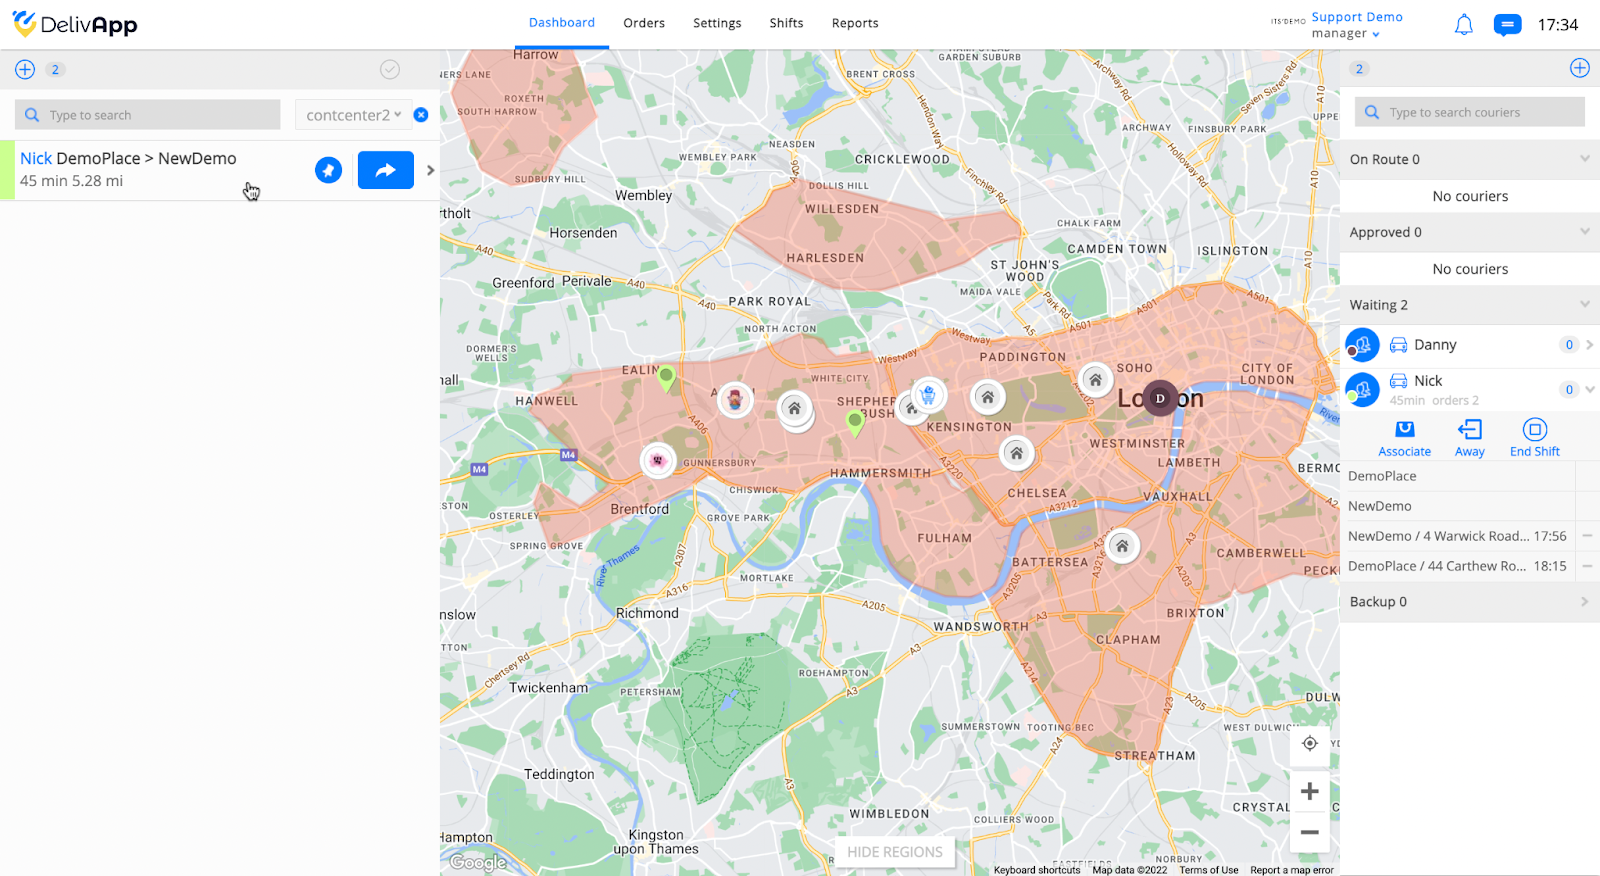
Once the order has been assigned to the courier, the order will be shown with the name of the courier on the left sidebar. You can check the orders assigned to any courier on the right sidebar by clicking on the arrow next to the courier's name.
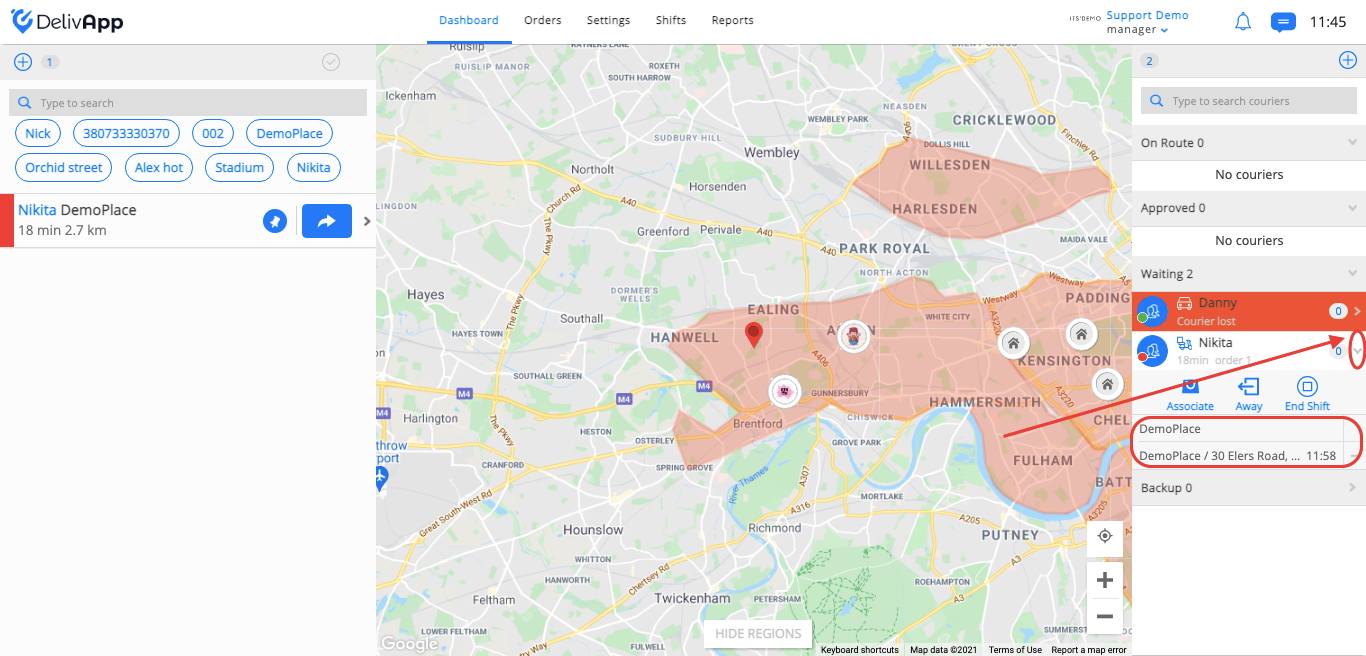
After the order(s) are assigned to the courier, the manager can change the route’s (orders dispatching priority) by clicking on it.
The screen with the route will appear, here’s where changes can be made. Once the orders are ready for delivery, click on the “Dispatch” button.
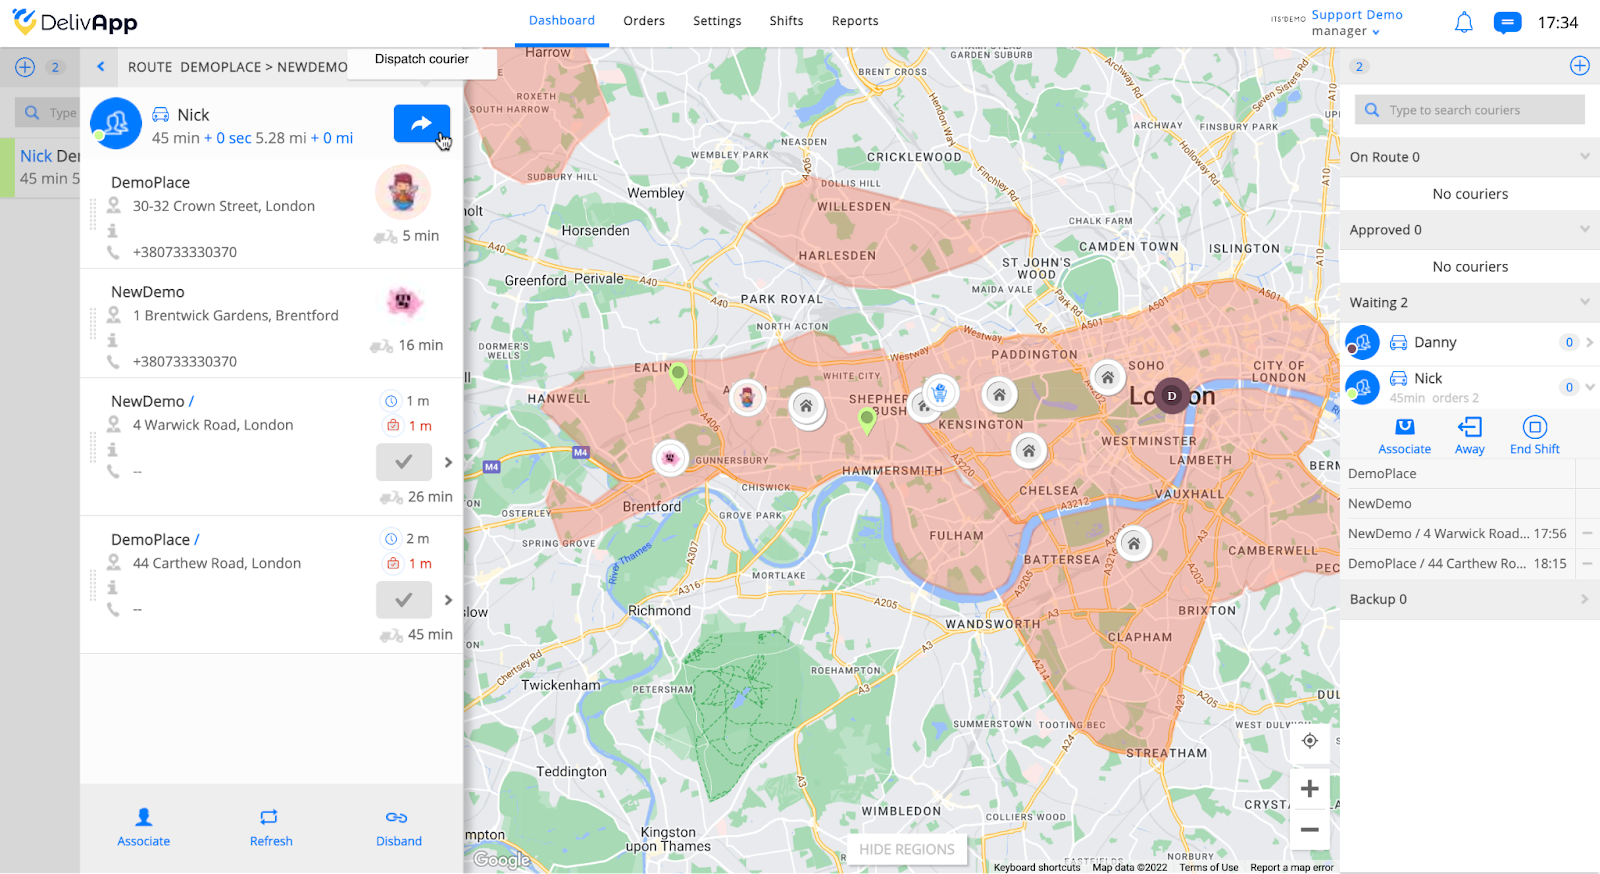
Done! The courier has received the route for the delivery.