DelivApp Mobile App Settings Guide for Business
2. Requirements and Preparation
Before you begin, make sure you have the following:
Access to the DelivApp admin panel with manager or administrator permissions.
A connected mobile client for staff members.
An understanding of key business processes related to orders: scheduled orders, courier assignment, and working with discounts.
3. Detailed Step-by-Step Configuration
Below is the list of all parameters available on the Mobile App Settings screen.

Require confirmation for scheduled orders
When enabled, the mobile app will request confirmation before accepting a scheduled order.
TIP: Recommended during periods of high workload.
Send courier assigned notification
When enabled, the manager receives a notification when an order is assigned to a courier.
TIP: Especially important when automated order assignment is activated.
Always show customer’s phone
Displays the customer’s phone number in all orders.
Hide customer’s name
When enabled, only the customer’s phone number and email are shown instead of the customer’s name.
ATTENTION: Useful when working with aggregators that restrict customer data visibility.
Always show customer’s address
Displays the full address in the order details.
Show delivery price
Adds the delivery fee amount to the order details interface.
Show driver tip
Displays the driver tip amount, if one has been added to the order.
Show ETA for next pickup only
Shows the estimated arrival time (ETA) only for the next pickup from the business — the nearest order that needs to be collected from the restaurant.
Show global discount info
When enabled, the manager can see active global discounts.
Show top up to minimum
Displays the amount the customer needs to add to reach the minimum order value (applicable when the business has set a minimum order threshold).
Do not allow assistance order creation
Blocks order creation in the mobile app according to the system restriction defined by this setting.
(UI-first note: This parameter name is taken directly from the English interface.)
Show service fee
Displays any additional service fee associated with the order.
Always show preparation time span
Shows the preparation time to the manager.
Require phone number on order creation
Prevents creating an order unless the customer’s phone number is provided.
Send new aggregated order notification
The manager receives a notification when a new (aggregated) order is added to an existing route.
TIP: Especially important when automated order assignment is activated.
Hide order delivery time
Allows hiding the estimated delivery time from the order view.
Time that precedes the display of a scheduled order in the list of all orders
This field allows you to specify the number of minutes before the scheduled execution time when a scheduled order becomes visible in the general order list.
Example: 25 minutes.
Disable orders for
This block lets you set time intervals (in minutes) used to temporarily disable order acceptance.
Each value becomes a quick-action button in the mobile app.
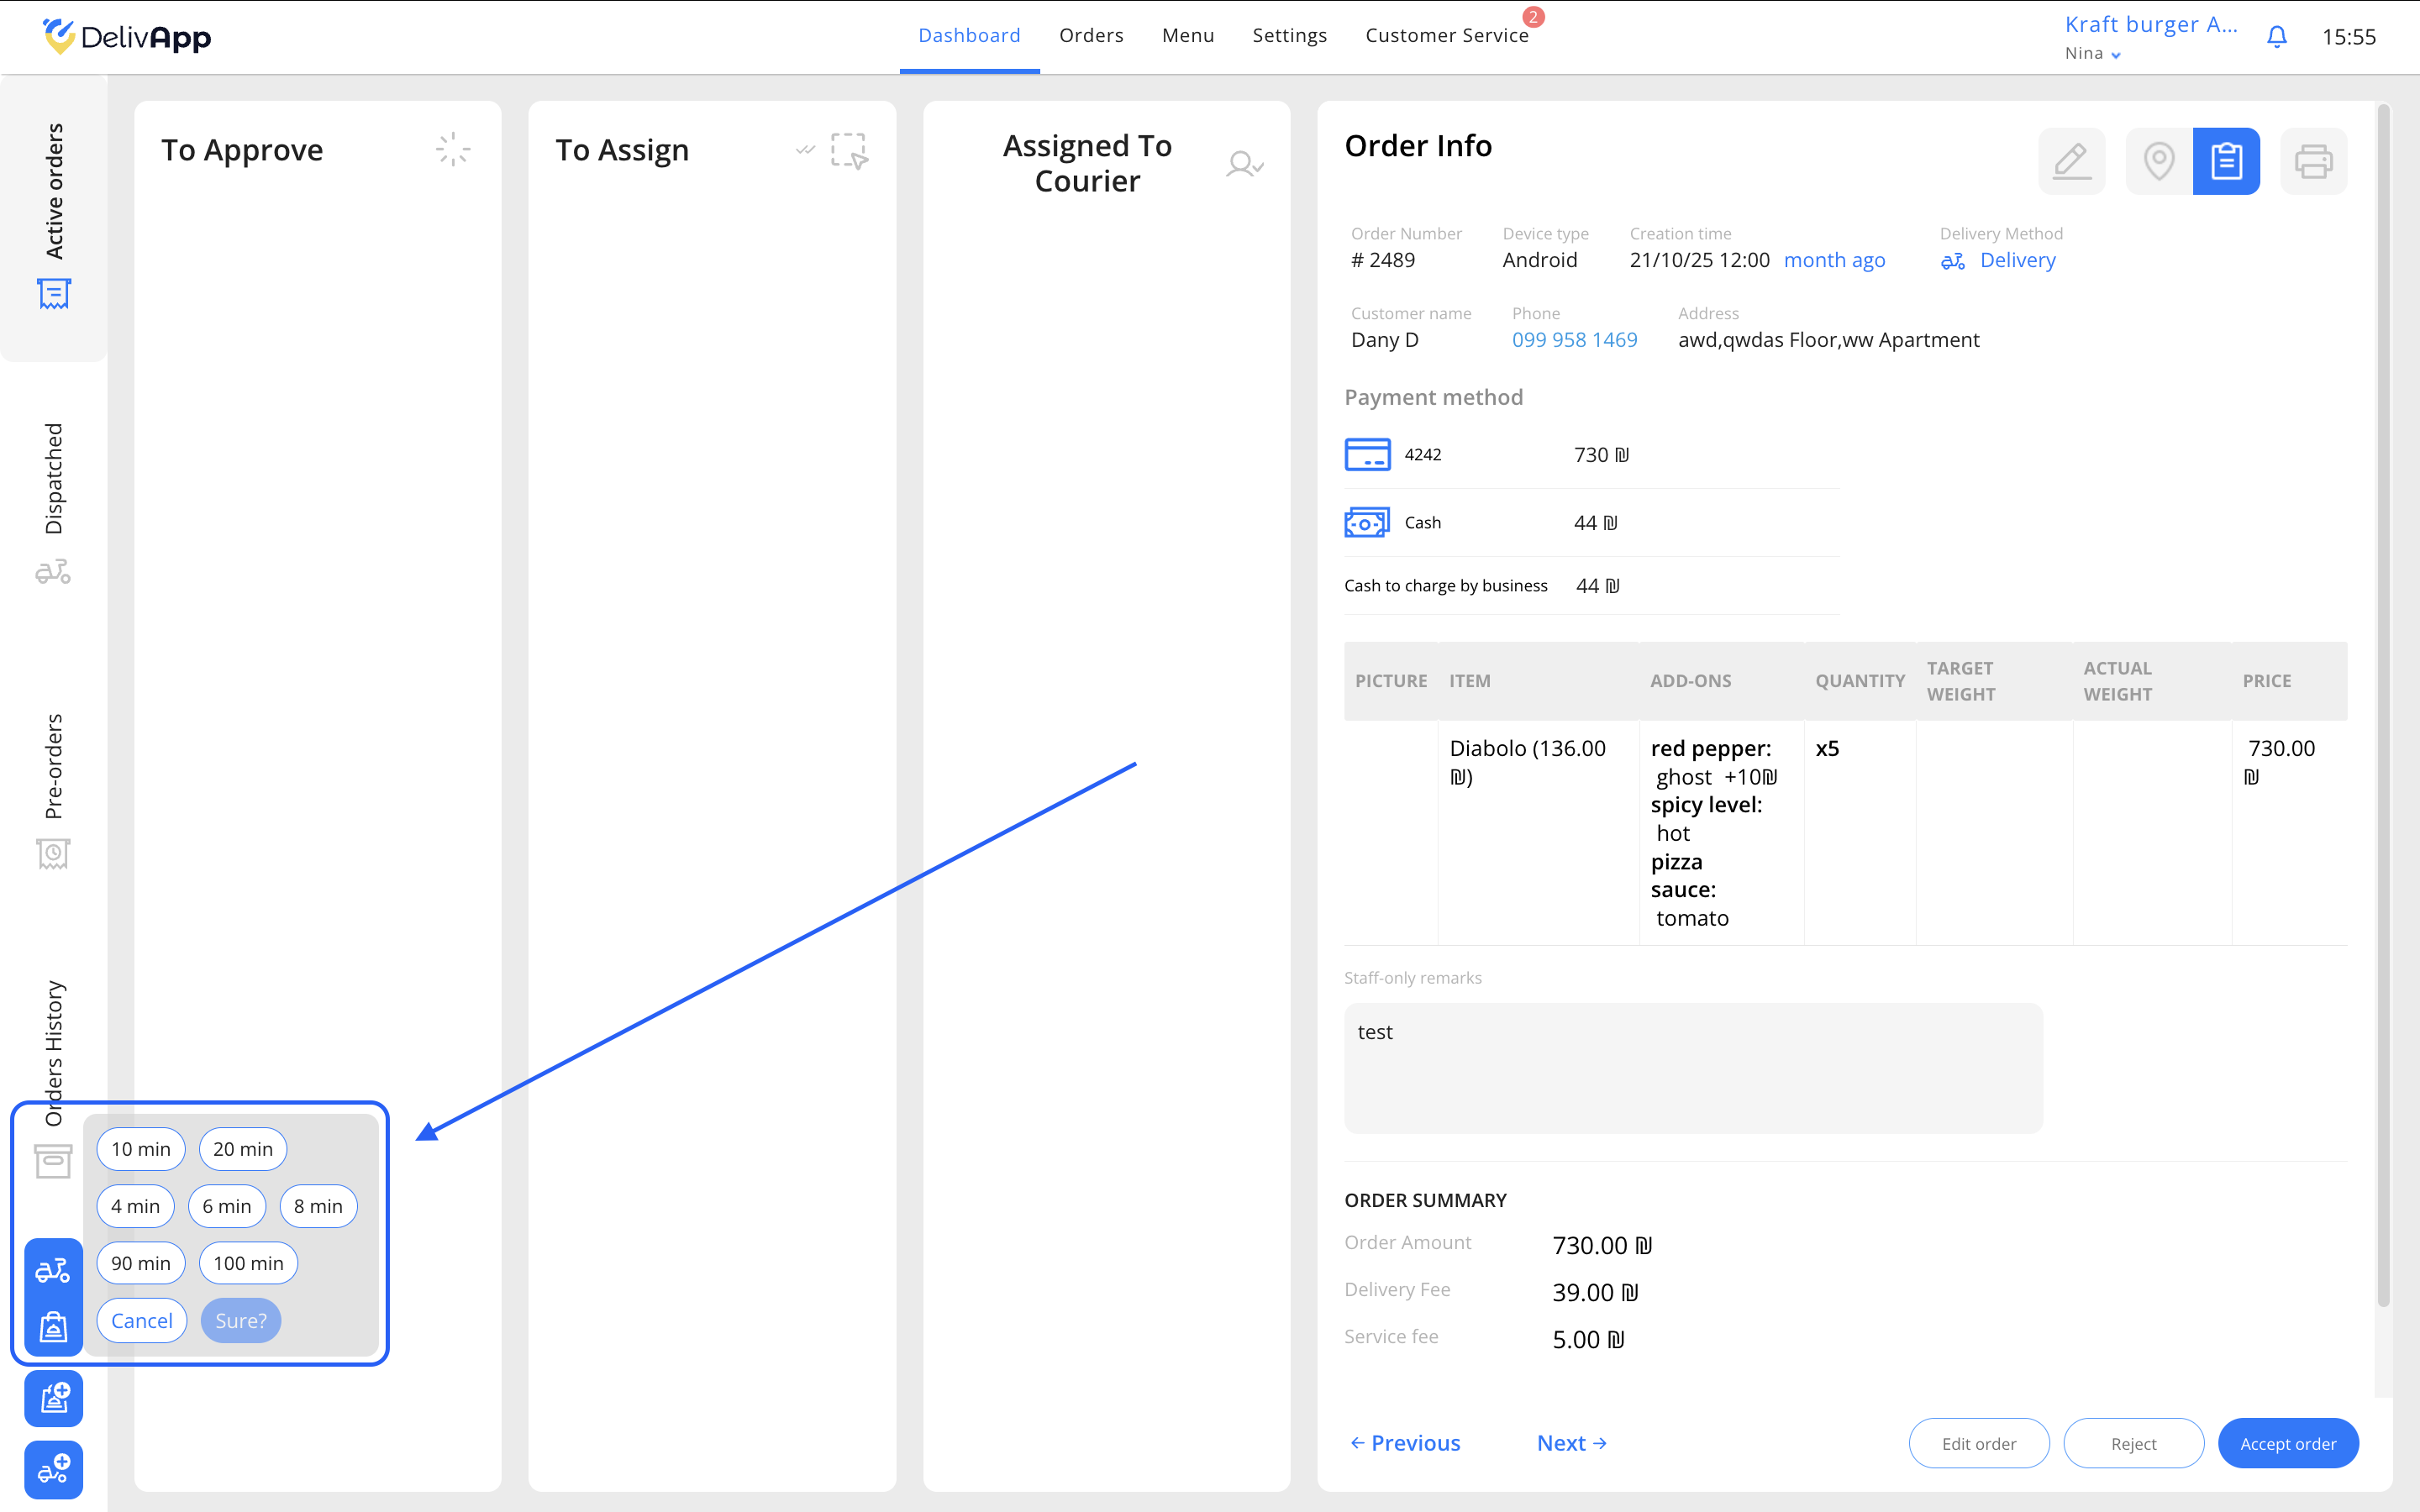
Examples of available intervals:
10 minutes
20 minutes
4 minutes
6 minutes
8 minutes
90 minutes
100 minutes
To add a new interval, tap Add, enter the desired value, and save.
PRO TIP: Create the most frequently used intervals — it helps staff work faster.
Saving changes
After modifying the parameters, tap Save.
4. Verifying the Result
To ensure that the settings were applied correctly:
Open the mobile app using a staff account.
Create a test order or assign an existing one.
Check the following:
Whether the phone number, address, and delivery price are displayed.
Whether notifications are received.
Whether scheduled orders appear correctly.
Whether the “Disable orders for” quick buttons work properly.
5. Frequently Asked Questions (FAQ)
The customer’s phone number or address is not displayed.
Make sure the Always show customer’s phone and Always show customer’s address settings are enabled.
Scheduled orders are not visible in the order list.
Check the value in the Time that precedes the display of a scheduled order field.
The temporary order-disabling button does not appear.
Make sure at least one interval has been added to the Disable orders for block.
6. Conclusion
You have now mastered the configuration of the DelivApp business mobile application. These settings allow you to tailor the mobile client to your business needs, improve communication quality, and optimize delivery operations.
If you encounter any unusual scenarios, feel free to contact DelivApp Support through the admin panel.